


How to label power cables behind a TV so you never unplug the wrong one-2026

How to label power cables behind a TV to Never Unplugging the Wrong Cable Again
We’ve all been there. You’re reaching behind the heavy TV console, squinting through a layer of dust, trying to reset the router. You grab a black cord, give it a firm yank, and—silence. The screen goes black. You didn’t unplug the router; you just killed your PlayStation mid-update or, worse, disconnected the DVR right as the season finale started.
Managing the “spaghetti monster” behind a home theater isn’t just about aesthetics; it’s about sanity. As someone who has spent years troubleshooting home setups and helping friends rescue their living rooms from cable chaos, I’ve learned that a little bit of labeling goes a long way.
In this guide, I’m going to share the exact methods I use—ranging from professional-grade solutions to “I found this in the kitchen drawer” hacks—to ensure you never play “cable roulette” again.
Why Cable Management Matters (Beyond the Mess)
Before we dive into the how, let’s talk about the why. A disorganized entertainment center isn’t just an eyesore; it’s a functional hazard.
- Heat Dissipation: Bundled, tangled cables trap dust. Dust acts as an insulator, causing your electronics to run hotter than they should.
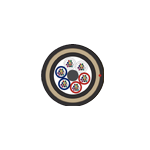
- Signal Interference: Crossing power cables directly over unshielded HDMI or audio cables can occasionally cause “noise” or signal degradation.
- Safety: Overloaded power strips hidden behind a mass of wires are a fire risk. Being able to see what is plugged in where allows you to balance the load.
Phase 1: The “Clean Slate” Strategy
You can’t label a mess. If you try to label cables while they are still tangled, you’ll just end up with labelled knots.
- Take a “Before” Photo: Trust me on this. Photograph every port on the back of your TV and receiver so you remember which HDMI goes to “ARC” and which goes to the “Game” port.
- Unplug Everything: Yes, everything. Lay the cables out flat.
- Dust It Off: Use a microfiber cloth or compressed air to clean the back of your devices and the power strips.
Phase 2: Choosing Your Labeling Method
There is no one-size-fits-all here. Depending on your budget and how much of a perfectionist you are, choose one of these three tried-and-tested methods.
1. The Professional Choice: Handheld Label Makers
If you love organization, a Brother P-Touch or a Dymo labeler is your best friend.
- The Technique: Print two identical labels for each cord (e.g., “TV POWER”). Wrap the label around the cord near the plug end, sticking the two ends of the tape together to create a “flag.”
- Pro Tip: Label both ends of the cable. One label near the TV port, and one near the power strip.
2. The Budget Hack: Bread Tags and Masking Tape
You don’t need to spend money to be organized.
- Bread Tags: Those plastic clips from loaf bread are perfect. They clip onto standard power cords easily, and you can write on them with a Sharpie.
- Colored Electrical Tape: Use a color-coding system. Blue for gaming, red for power, green for audio. Wrap a small strip around the base of the plug.
3. The “Visual” Method: Cable Tags
Specifically designed plastic tags (like the ones from Cord IDs) allow you to write on a surface that won’t peel or fade over time. These are great because they often come in different colors, making it easy to identify the “Blue” cable from across the room.
Comparison: Which Labeling Style Suits You?
| Method | Cost | Durability | Best For |
| Label Maker | Medium | High | Permanent, clean setups |
| Bread Tags | Free | Medium | Quick DIY fixes |
| Washi Tape | Low | Low/Medium | Color-coding lovers |
| Plastic Cord Tags | Low | Very High | Heavy-duty home theaters |
Phase 3: The Step-by-Step Execution
Here is the realistic way to get this done in under 30 minutes.
Step 1: Grouping
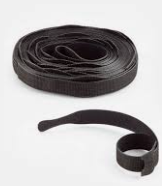
Before labeling, group your cables by function. Use Velcro ties (never zip ties!) to bundle the cables coming from the TV toward the power strip. Velcro is superior because you can easily add or remove a cable later without needing scissors.
Step 2: The “Plug End” Labeling
This is the most critical part. Label the actual plug that goes into the wall. When you are looking down at a power strip with 10 identical black plugs, you want to see a label that says “SONY TV” or “XBOX” staring back at you.
Step 3: The “Port End” Labeling
Label the end that plugs into the device. If your TV has four HDMI ports, label the cable “HDMI 1 – Apple TV.” This saves you from the “Input Dance” on your remote later on.
Expert Note: Always leave a little “slack” near the plug. If a cable is pulled too tight, the label might rub against the outlet and peel off over time.
Dealing with “The Brick” (Power Adapters)
We all have those massive, bulky power bricks for consoles or internet routers. These are the hardest to label because they take up so much space.
- The Solution: Write directly on the brick with a silver or white metallic permanent marker. It won’t smudge, and it’s much easier than trying to stick a label onto a textured plastic surface.
Maintenance: Keeping it Organized
Labeling is a “one and done” task, but only if you stick to the system. Every time you get a new gadget—a new soundbar or a late-gen console—make it a rule: The cable does not get plugged in until the label is on.
Final Thoughts from a Fellow Tech-Head
Modern life is cluttered enough; your TV stand shouldn’t add to your stress. Taking thirty minutes on a Saturday to label your power cables is a gift to your future self. The next time your internet goes down or you need to swap out a component, you won’t be crouching on the floor with a flashlight, praying you don’t unplug the wrong thing.
You’ll be the person who knows exactly which cord is which. And honestly? That’s a pretty great feeling.