


How to Hide Cables on Glass Desk Without Adhesive (100% Clean & Effective)
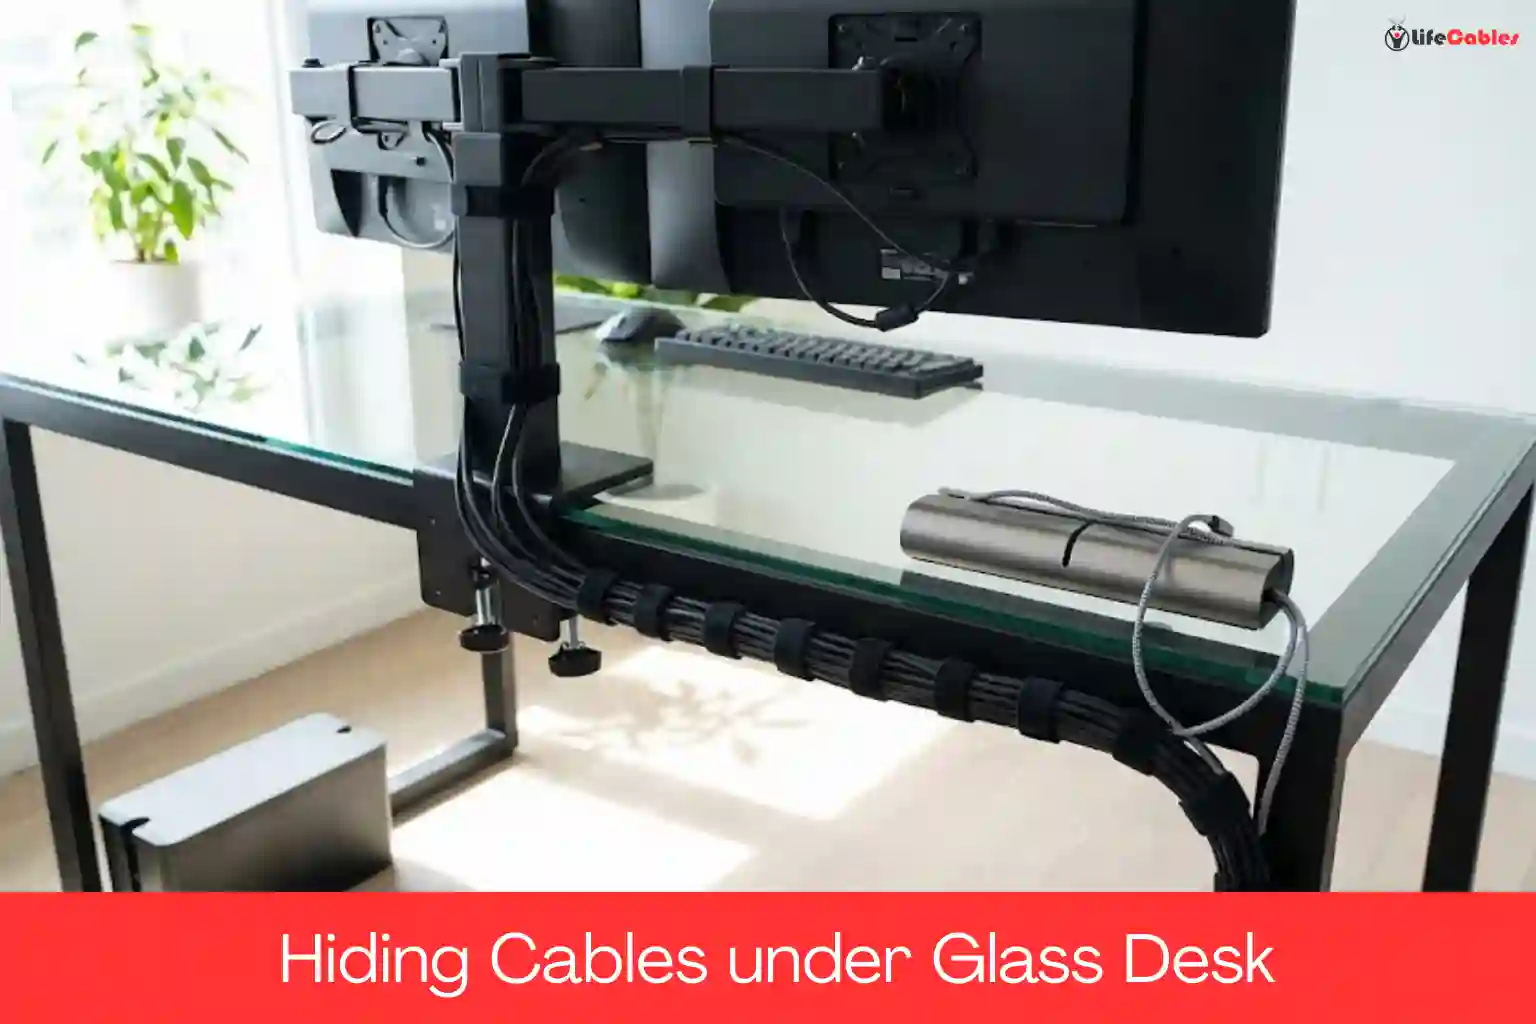
Hide Cables on Glass Desk
We’ve all been there. You see that sleek, minimalist glass desk in a showroom or a high-end tech guy’s setup on YouTube, and it looks like a piece of modern art. It’s airy, it makes the room look bigger, and it’s undeniably clean.
Then you bring it home. You set up your dual monitors, your PC or Mac, your desk lamp, and your charging hubs. Suddenly, that piece of modern art looks like it’s being strangled by a black plastic octopus.
The struggle with glass desks is unique because there is literally nowhere to hide. On a wooden desk, you can screw in a tray or drill a “grommet” hole. On a glass desk, every cord is visible from the front, the side, and—most annoyingly—the top. If you’re like me, you’ve probably tried the “quick fix” of double-sided tape or adhesive clips, only to realize they are a total disaster for glass.
In this guide, I’m going to share the non-adhesive system I’ve perfected after years of trial and error. We’re going to achieve that “floating” look using physics, gravity, and a bit of clever engineering.
Effective Strategies to Hide Cables on Glass Desk Setups
Before we get into the “how,” let’s talk about why you should put the Command strips away.
First, there is the Aesthetic Failure. Glass is transparent. When you stick a cable clip to the underside of a glass desk, you aren’t hiding it; you’re just looking at a gray, gummy blob of glue from the top of your desk every single day. It ruins the very “clean” look you bought the desk for.
Second, there is the Science of Failure. Most glass desks are made of tempered glass. This material is sensitive to temperature fluctuations. As your monitors and power bricks heat up, the glass expands and contracts on a microscopic level. This constant shifting, combined with the incredibly smooth (non-porous) surface of glass, causes most adhesives to lose their grip within months. You’ll wake up one morning to find your power strip has crashed onto your feet.
Lastly, there is the Residue Risk. Scraping dried adhesive off tempered glass is a nightmare. If you use a metal blade, you risk scratching the surface or damaging any “tint” or “frosted” coating on the underside.
1. The Savior: Clamp-On Cable Management Trays
If you take nothing else away from this, remember this: Clamps are your best friend. Since we can’t drill into glass, we have to use tension.
A clamp-on cable management tray attaches to the back edge of your desk. It essentially creates a “gutter” that runs along the rear of your workspace.
Why it works:
- Zero Residue: You can move it, adjust it, or take it off whenever you want.
- High Capacity: These trays are deep enough to hold a bulky power strip and those giant “brick” adapters that come with monitors.
- Visual Concealment: If you pick a tray that matches the color of your desk frame (usually black, white, or silver), it blends into the silhouette of the desk.
Expert Tip: Look for a “mesh” or “wire” style tray rather than a solid plastic one. Glass desks don’t dissipate heat as well as wood; a mesh tray allows for better airflow, ensuring your power bricks don’t overheat.
2. Utilizing the “Invisible” Legs (The Hugging Method)
Most glass desks aren’t just a sheet of glass floating in the air; they have a metal or wooden frame. That frame is your secret weapon. Instead of trying to hide cables behind the desk, we are going to “hug” the legs.
Since we aren’t using adhesive, you’ll want to use Velcro Cable Ties or Reusable Silicone Straps.
The Technique:
Bundle all the cables coming down from the top of the desk (monitor, keyboard, etc.) into one thick “umbilical cord.” Use Velcro ties to strap this bundle tightly against the back of the least-visible desk leg.
Because the ties wrap around the metal leg itself, they stay up via friction and tension. From the front of the desk, the cables are hidden behind the profile of the leg. It’s a simple geometric trick that works every time.
3. Gravity-Based Solutions: Weighted Cable Bases
One of the most annoying parts of a glass desk is when your phone charger or USB-C cable slides off the back the second you unplug it.
The “no-adhesive” solution is a Weighted Cable Base. These are heavy blocks (often made of silicone or zinc alloy) that sit on top of your desk. They use gravity, not glue, to stay in place. They look like a deliberate desk accessory—almost like a paperweight—rather than a messy DIY fix.
4. The “Safety First” Engineering Note
When managing a glass desk, we have to talk about Load Bearing. Standard tempered glass on desks is usually between **$6mm$ and $10mm$ thick. While tempered glass is strong, it is vulnerable to “point pressure.” When you use clamp-on accessories, you are applying a lot of pressure to a very small area.
How to stay safe:
- Rubber Pads: Ensure any clamp you buy has rubber or foam padding. This distributes the pressure and prevents the metal from direct contact with the glass.
- Avoid the Corners: Never clamp anything too close to the corners of the glass, as this is where the internal tension of tempered glass is highest and most vulnerable.
- Check the Specs: If your desk has a weight limit of 50 lbs and your monitors already weigh 30 lbs, don’t hang a 10 lb tray of cables off the back edge.
5. The 30-Minute Transformation: Your Step-by-Step Workflow
Ready to clean up the mess? Don’t just start plugging things in. Follow this sequence for the best results:
- The Total Purge: Unplug everything. Clear the desk surface entirely. It’s much easier to plan a layout when you aren’t fighting tangled wires.
- Mount the Anchor: Attach your clamp-on cable tray to the back-center or back-corner of the desk. Ensure the clamps are tight but not “over-tightened.”
- The Power Strip Placement: Place your power strip into the tray. This is now the “brain” of your desk.
- The Monitor Arm (Optional): If you use a monitor arm, clamp it on now. Run the monitor cables through the arm’s built-in channels. This keeps the wires off the glass surface entirely.
- The Vertical Run: Group the remaining wires and use Velcro to “hug” the desk leg as discussed.
- The Desktop Finish: Place your weighted cable base near the front or side for your daily chargers.
Summary Comparison: The Non-Adhesive Toolkit
| Solution | Best For… | Why it wins on Glass |
| Clamp-on Tray | Power strips & Bricks | Zero residue, heavy-duty capacity. |
| Velcro Ties | Running cables down legs | Reusable, doesn’t peel off over time. |
| Weighted Base | Charging cables | Moves with you, looks like a premium accessory. |
| Cable Box | Floor-level mess | Keeps the “brain” of the wires out of sight. |
| Monitor Arm | HDMI/DisplayPort | Frees up the glass surface for a “floating” look. |
Final Thoughts: The Mental Reward
I’ll be honest: managing cables on a glass desk takes about 30 minutes longer than it does on a wooden one. You have to be more intentional. You can’t just “shove and forget.”
But the payoff? It’s incredible. When you sit down and can see through your desk to the floor, and there’s nothing but a clean workspace in front of you, it actually changes your headspace. It’s calmer, more professional, and finally looks like that Pinterest photo that inspired you in the first place.