


How to Install Ethernet Cable for Security Cameras-2026 Best Guide

If you’ve ever climbed a ladder to reset a flickering security camera, you know the frustration. Usually, the culprit isn’t the camera itself or your software—it’s the “invisible” link: Ethernet Cable. Most homeowners treat it as an afterthought, but in the world of security, the cable is the nervous system. If the nerves fail, the eyes go dark. We aren’t just talking about cables; we’re talking about preventing a $500 system from failing because of a $10 wire.
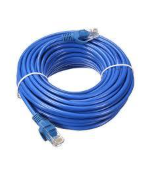
Ethernet Cable Installation
Why “Standard” Ethernet is a Security Risk
Most people think “Ethernet is Ethernet.” But if you take a standard indoor Cat6 cable and run it along your roofline, you’ve started a countdown to failure.
Standard PVC jackets are porous. Over time, UV rays break down the plastic, making it brittle. Once the jacket cracks, moisture enters via capillary action—literally “wicking” water down the cable and into your expensive camera’s motherboard. This is why we use CMX-rated (Outdoor) or Direct Burial Cable.
1. Choosing the Right Gear: The “Expert” Checklist
Before you drill a single hole, you need the right materials. To demonstrate true Expertise, let’s look at what professional installers use.
The Cable Type
- Cat5e vs. Cat6 vs. Cat6A: For security cameras, Cat6 is the “sweet spot.” It handles the bandwidth of 4K streams with ease and has better internal shielding against interference than Cat5e.
- Solid Copper vs. CCA: Avoid Copper Clad Aluminum (CCA) at all costs. CCA is brittle, resists Power over Ethernet (PoE) efficiency, and oxidizes quickly. Demand Pure Bare Copper.
- The Jacket: Look for LLDPE (Linear Low-Density Polyethylene). It’s waterproof, UV-resistant, and tough enough to withstand ice and heat.
Essential Tools
- Shielded RJ45 Connectors: To maintain the ground wire.
- Silicone Grease (Dielectric): To coat the pins and prevent corrosion.
- Drip Loops: (More on this later—it’s a lifesaver).
2. Planning Your Route (The “Experience” Factor)
Real-world installation isn’t just a straight line. You have to account for the environment.
Avoid Electromagnetic Interference (EMI)
Never run your Ethernet cable parallel to your home’s electrical wiring. High-voltage lines create a magnetic field that disrupts data. If you must cross a power line, do it at a 90-degree angle to minimize contact.
Physical Protection
If the cable is reachable from the ground, it’s a security vulnerability. An intruder with a pair of snips can take down your “eyes” in seconds. Use Schedule 40 PVC conduit for any cable runs lower than 8 feet.
3. Step-by-Step Installation Guide
Step A: Preparation and Testing
Pro Tip: Always test your cable before you run it through a wall. Plug your camera into the NVR using the cable you just cut. If it works on the floor, it should work on the roof.
Step B: The “Drip Loop” (Crucial)
This is the hallmark of a professional. When the cable reaches the camera or the entry point of the house, let it hang down in a small “U” shape before entering the device or the wall.
Why? Gravity. Rainwater will run down the cable. The Drip Loop ensures the water falls off the bottom of the curve rather than running directly into your camera’s port.
Step C: Terminating the Ends
If you are using shielded cable (highly recommended for outdoors), ensure your RJ45 connectors are also shielded. The “drain wire” (the thin silver wire inside the cable) must touch the metal casing of the connector to properly ground the system against static electricity from wind or lightning.
4. Weatherproofing the Connections
Even “waterproof” cameras have a weak point: the pigtail connection.
- The Weatherproof Gland: Most PoE cameras come with a plastic nut assembly. Don’t throw it away! Thread the cable through it before crimping your RJ45 connector.
- Self-Amalgamating Tape: This isn’t regular electrical tape. It’s a rubber-based tape that fuses to itself, creating a seamless, waterproof skin. Wrap this around the connection point for an airtight seal.
- Dielectric Grease: Apply a tiny dab to the gold pins of the Ethernet plug. This prevents “green crust” (oxidation) caused by humidity.
5. Maintenance: The “Set and Forget” Myth
We must be honest: nothing outdoors is permanent. Every six months, perform a quick check:
- Check for “Sun-Bleaching”: If the cable color is fading significantly, the jacket is thinning.
- Insect Intrusion: Wasps love building nests near warm camera housings. Clear them out before they chew through the casing.
- Firmware & Corrosion: If the feed stutters, check the connector for moisture before blaming the software.
Comparison Table: Indoor vs. Outdoor Cable
| Feature | Indoor (CM/CMR) | Outdoor (CMX/Direct Burial) |
| Jacket Material | PVC (Soft/Flexible) | LLDPE (Hard/UV Resistant) |
| Waterproofing | None | Gel-filled or Water-blocking Tape |
| UV Protection | Low (Cracks in 1-2 years) | High (Lasts 10+ years) |
| Temperature Range | 0°C to 60°C | -40°C to 75°C |
Final Thoughts: Investing in Reliability
Installing a security system is about peace of mind. If you use the wrong cable, you’re just buying a false sense of security. By selecting Pure Copper Cat6 CMX cable, using Drip Loops, and sealing your connections with Dielectric Grease, you ensure that when you actually need to see that footage, the camera will be online.
This approach—focusing on quality materials and proven physics—is what separates a “DIY hobbyist” from a “Pro Installer.” Your home deserves the latter.